Introduction
In today’s fast-paced development world, developers want the flexibility to use their favorite web technologies to build mobile apps. React and Apache Cordova together make this possible, allowing developers to write a single codebase in React and deploy it on Android and iOS using Cordova.
In this guide, we’ll walk you through how to integrate React with Cordova to build a hybrid mobile application.
- Utilizes VueJS for building the app's user interface.
- Integrates the barKoder Barcode Scanner SDK to enable advanced barcode scanning.
- Leverages Cordova for seamless cross-platform deployment to iOS and Android.
- Supports a wide range of barcode types, including 1D and 2D barcodes.
Why Use React with Cordova?
- Write Once, Deploy Everywhere – Use React to build web-based UI and deploy it on mobile devices using Cordova.
- Access Native Features – Cordova plugins provide access to native device features like camera, GPS, and file system.
- Faster Development – No need to learn Java/Kotlin for Android or Swift for iOS.
Step-by-Step Guide to React + Cordova Integration - Start a Cordova Project
- Install Cordova: npm install -g cordova
- Create a New Cordova Project: cordova create my-cordova-app com.example.cordovaapp CordovaApp
- Navigate into the Cordova Project: cd my-cordova-ap
- Add Platforms: cordova platform add ios or cordova platform add android
- Open IDE and Start Coding: Open your chosen IDE or text editor and start building your app using web technologies.
- Build and Run: Use Cordova commands to build and run your app on different platforms. cordova build ios or cordova build android
Cordova is a cross-platform app runtime that makes it easy to build web apps that run natively on iOS, Android and the web. To get started with building apps using Cordova, you'll need to meet certain requirements:
- Node.js and npm:
- Ensure you have Node.js installed on your machine. Cordova requires Node.js version 10 or later.
- npm (Node Package Manager) is also required. It usually comes with Node.js.
- Text Editor or IDE:
- Choose a text editor or IDE for coding (e.g., Visual Studio Code).
- Git:
- Install Git for managing projects.
- Command Line Interface (CLI):
- Cordova commands are executed via the command line. Make sure you have a command line interface (CLI) installed and accessible on your system.
- Mobile Development SDKs:
- For iOS: Install Xcode (macOS).
- For Android: Install Android Studio.
- Install Cordova globally on your machine:
npm install -g cordova2. Create a New Cordova Project:
cordova create my-cordova-app com.example.cordovaapp CordovaApp- Navigate into the Cordova Project:
cd my-cordova-app3.1. Add Android Platform:
cordova platform add android- Add barkoder-cordova Plugin:
cordova plugin add barkoder-cordova- Create a New React Application:
npx create-react-app react_app- Configure React Build Output for Cordova:
Update the react_app project's build configuration to output to the www directory, which is used by Cordova for building mobile applications. Create scripts folder and inside create copy-to-cordova.js that contains code for build configuration output to the www directory. Edit package.json in your React project (react_app) to set the build output directory:
  "scripts": {
  "start": "react-scripts start",
  "build": "react-scripts build && npm run copy-to-cordova",
  "copy-to-cordova": "node ./scripts/copy-to-cordova.js",
  "test": "react-scripts test",
  "eject": "react-scripts eject"
},- Build React Application:
cd react-app
npm run build- Make sure cordova.js script is included in public/index.html:
<script src="cordova.js"></script>- Test and Run Your App:
back to cordova project root
React:
In your components/[fileName].js:
import React, { useRef, useState, useEffect } from 'react';
import { BarcodeType } from '../plugins/barkoder-cordova-plugin/www/BarkoderConfig.ts';
const BarcodeScannerApp = () => { const barkoderViewRef = useRef(null); const [scannedResult, setScannedResult] = useState(null); const [isScanning, setIsScanning] = useState(false); const [isInitialized, setIsInitialized] = useState(false); const [isBarcodesPopupVisible, setIsBarcodesPopupVisible] = useState(false) const barcodeTypes = [ { name: "QR", type: "qr", mode: "2d" }, { name: "Aztec", type: "aztec", mode: "2d" }, { name: "Datamatrix", type: "datamatrix", mode: "2d" }, { name: "Dotcode", type: "dotcode", mode: "2d" }, { name: "Code 128", type: "code128", mode: "1d" }, { name: "Code 93", type: "code93", mode: "1d" }, { name: "Code 39", type: "code39", mode: "1d" }, { name: "Codabar", type: "codabar", mode: "1d" }, { name: "Ean 8", type: "ean8", mode: "1d" }, { name: "Ean 13", type: "ean13", mode: "1d" }, { name: "Postal IMB", type: "postalIMB", mode: "1d" }, { name: "Postnet", type: "postnet", mode: "1d" }, { name: "Planet", type: "planet", mode: "1d" }, { name: "Australian Post", type: "australianPost", mode: "1d" }, { name: "Royal Mail", type: "royalMail", mode: "1d" }, { name: "KIX", type: "kix", mode: "1d" }, { name: "Japanese Post", type: "japanesePost", mode: "1d" } ]; const [enabledBarcodes, setEnabledBarcodes] = useState( barcodeTypes.reduce((acc, barcode) => { acc[barcode.type] = true; return acc; }, {}) ); useEffect(() => { const initializeBarkoder = async () => { await window.Barkoder.registerWithLicenseKey("YOUR_KEY_HERE"); const boundingRect = barkoderViewRef.current.getBoundingClientRect(); await window.Barkoder.initialize( Math.round(boundingRect.width), Math.round(boundingRect.height), Math.round(boundingRect.x), Math.round(boundingRect.y) ); setBarkoderSettings(); setActiveBarcodeTypes(); }; if (!isInitialized) { const timeout = setTimeout(() => { initializeBarkoder(); }, 500); return () => clearTimeout(timeout); } }, []); const setActiveBarcodeTypes = async () => { try { await window.Barkoder.setBarcodeTypeEnabled(BarcodeType.code128, true); await window.Barkoder.setBarcodeTypeEnabled(BarcodeType.ean13, true); } catch (error) { console.error('Error setting active barcode types:', error); throw error; } }; useEffect(() => { setActiveBarcodeTypes(); }, [isBarcodesPopupVisible, enabledBarcodes]); const setBarkoderSettings = async () => { try { window.Barkoder.setRegionOfInterestVisible(true); window.Barkoder.setRegionOfInterest(5, 30, 90, 40); window.Barkoder.setCloseSessionOnResultEnabled(true); window.Barkoder.setMaximumResultsCount(200); window.Barkoder.setImageResultEnabled(true); window.Barkoder.setLocationInImageResultEnabled(true); window.Barkoder.setLocationInPreviewEnabled(true); window.Barkoder.setBarcodeThumbnailOnResultEnabled(true); window.Barkoder.setBeepOnSuccessEnabled(true); window.Barkoder.setVibrateOnSuccessEnabled(true); window.Barkoder.setPinchToZoomEnabled(true); window.Barkoder.setZoomFactor(currentZoomFactor); } catch (error) { console.error("Error setting Barkoder settings:", error); throw error; } }; const startScanning = () => { try { setIsScanning(true); setScannedResult(null); if (window.Barkoder) { window.Barkoder.startScanning(handleScanResult, (error) => { console.error("Scanning error:", error); setIsScanning(false); }); } else { console.error("BarkoderScanner plugin not available"); setIsScanning(false); } } catch (error) { alert("Error: " + error.message); setIsScanning(false); } }; const handleScanResult = (barkoderResult) => { setIsScanning(false); const decoderResults = Array.isArray(barkoderResult?.decoderResults) ? barkoderResult.decoderResults : [barkoderResult?.decoderResults]; const newScans = decoderResults.map((result) => { return { id: Math.floor(Math.random() * 1000000), textualData: JSON.stringify(result?.textualData), type: JSON.stringify(result?.barcodeTypeName), resultImage: `data:image/jpeg;base64,${barkoderResult?.resultImageAsBase64}`, thumbnailImage: `data:image/jpeg;base64,${barkoderResult?.resultThumbnailsAsBase64[0]}`, }; }); setScannedResult(newScans[0]); setFullResultImage(newScans[0].resultImage); setRecentScans((prevScans) => [...prevScans, ...newScans]); window.Barkoder.stopScanning(); }; const stopScanning = () => { window.Barkoder.stopScanning( () => setIsScanning(false), (error) => console.error('Stop scanning error:', error) ); }; return ( <div id="container"> <div id="barkoderView" ref={barkoderViewRef}> </div> <div className="btnContainer"> {!isScanning && ( <div className="actionButton" onClick={isInitialized ? tapScan : startScanning} > <img width="</span><span class="pl-s pl-c1">40" alt="scan icon" src="/assets/scan-circle.svg" /> </div> )} <div className="result_text_img"> <span className="result_title">{scannedResult?.type}</span> {scannedResult?.thumbnailImage && <img className="resultImage" src={scannedResult?.thumbnailImage} alt="Scanned Thumbnail" />} <p>Result: <a href={scannedResult?.textualData}>{scannedResult?.textualData}</a> </p> </div> </div> </div> ); }; export default BarcodeScannerApp;
<style>
#barkoderView {
min-height: 85vh;
height: 100%;
position: relative;
top: 60px;
}
// other styles as needed
</style>
Conclusion
You can download the whole code from https://github.com/barKoderSDK/cordova-react-app which should be enough to get you started. With these steps, you will have a working project built on Cordova utilizing the reactJS framework.
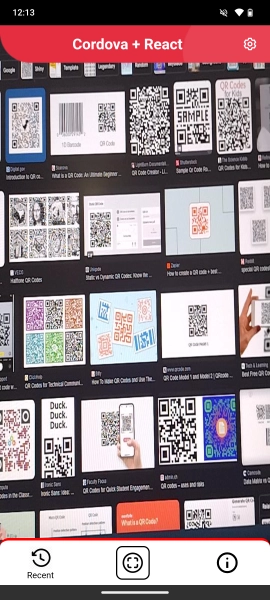
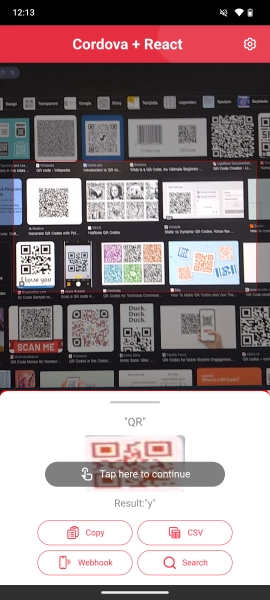
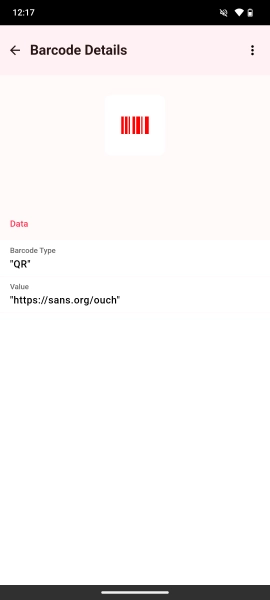
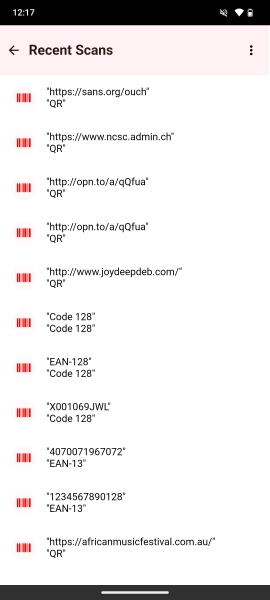
Here are some images of how the built app should look for you once you successfully build and run it.